|
Most of the interactive effects support a ripple layer. This creates a water like effect which distorts the layers beneath. When motion is detected, ripples are created at the point of motion and slowly die out.
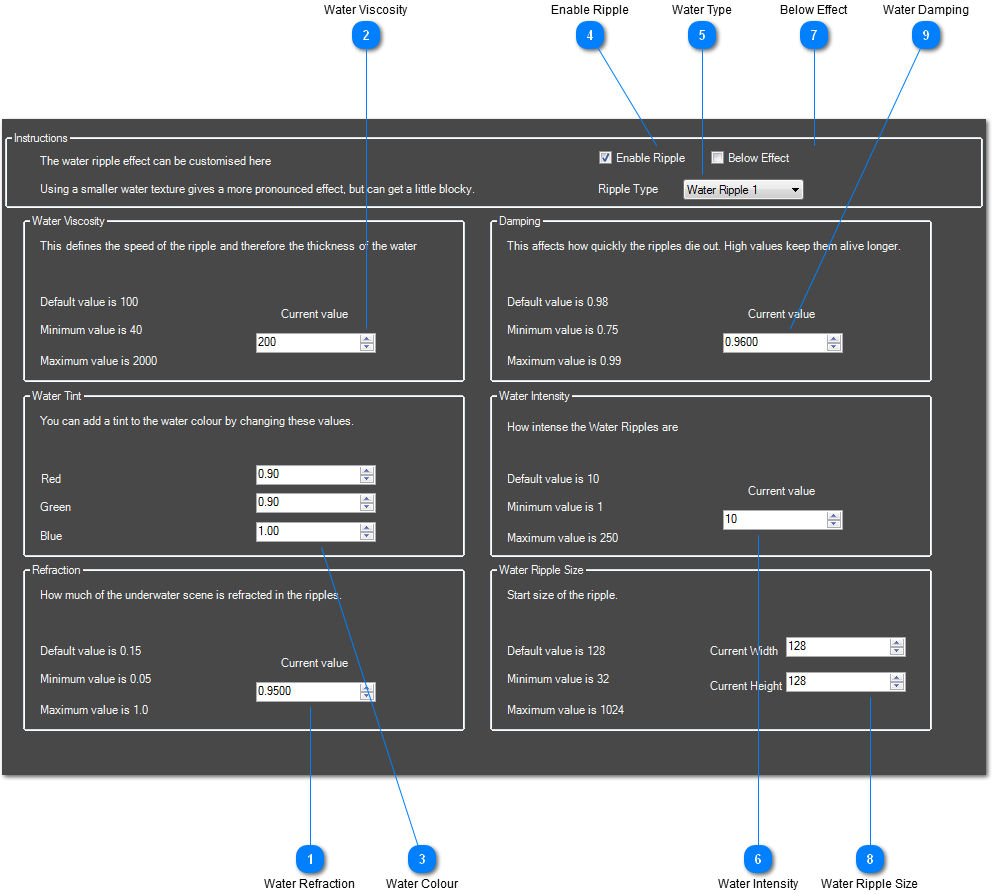
 Water Refraction
Refraction sets how much the layers below the water are distorted by the water ripple.
| |
 Water Viscosity
This setting is for Water Ripple 1 and sets how fast the water ripple moves. You can increase the value to make the water appear more thick and viscous.
| |
 Water Colour
This is how much colour of the effect beneath the water ripple is let through. This allows you to add a tint to the water.
| |
 Enable Ripple
This will enable or disable the Water Ripple on top of your effect.
| |
 Water Type
AdVis has two versions of the water ripple. Water Ripple 1 creates a realistic wave that refracts everything beneath it but if it's a small display area with lots of traffic you may wish to use Water Ripple 2 which is not so obtrusive.
| |
 Water Intensity
This sets the force of the water ripple when it's first created.
| |
 Below Effect
If enabled, the water ripple will appear below your effects main layer but in front of the background layer.
| |
 Water Ripple Size
This setting changes the actual size of the ripples. Valid options are 32, 64, 128, 256, 512 and 1024.
| |
 Water Damping
Damping sets how quickly the waves will die down For example, a settings of 0.5 will mean for each frame the ripple will be half the size and would quickly disappear. A setting of 0.99 will mean the ripple is only slightly smaller each frame and will go on for a long time.
| |
|
|