Installation of an interactive projection system is reasonably straight forward. It's no more difficult than a normal projector installation.
For projecting on the floor, you can either use a projection mount to point the projector straight down (May reduce lamp life on certain models), or use a mirror to bounce the image onto the ground.
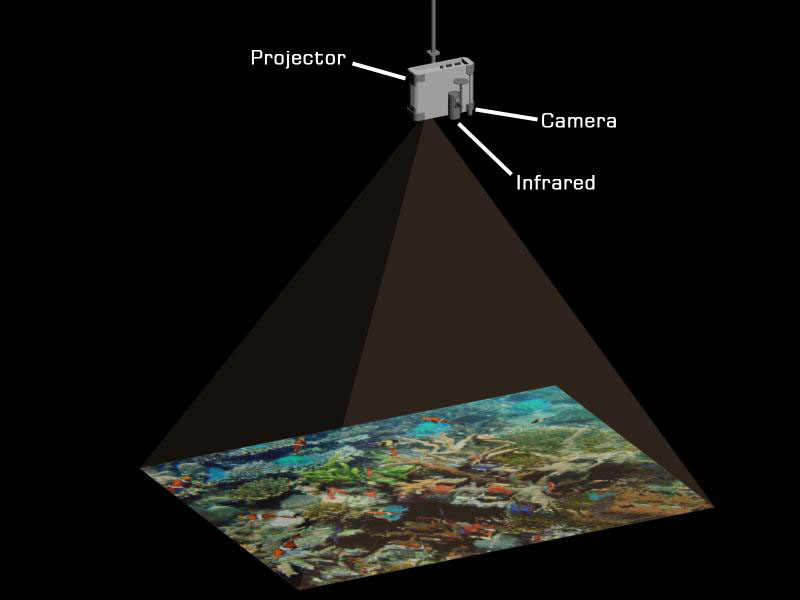
Interactive Floor/Table
For floor installations, the tracking kit is best positioned directly above the projection area. The camera needs to be able to view the entire projection. It has a wide viewing angle, and as long as it's at the same height or higher than the projector, it will be able to cover even short-throw projection setups.
Interactive Wall
For wall installations, the projector can either rear or front project onto the projection surface. The tracking kit should be ceiling mounted in front of the projection surface and angled to cover the entire projection area. You can adjust the position of the tracking camera and angle required to capture the projection area depending on where exactly you want people to be able to react with it. The closer the tracking camera is mounted to the projection area, the closer people will have to go to the screen to interact with it.
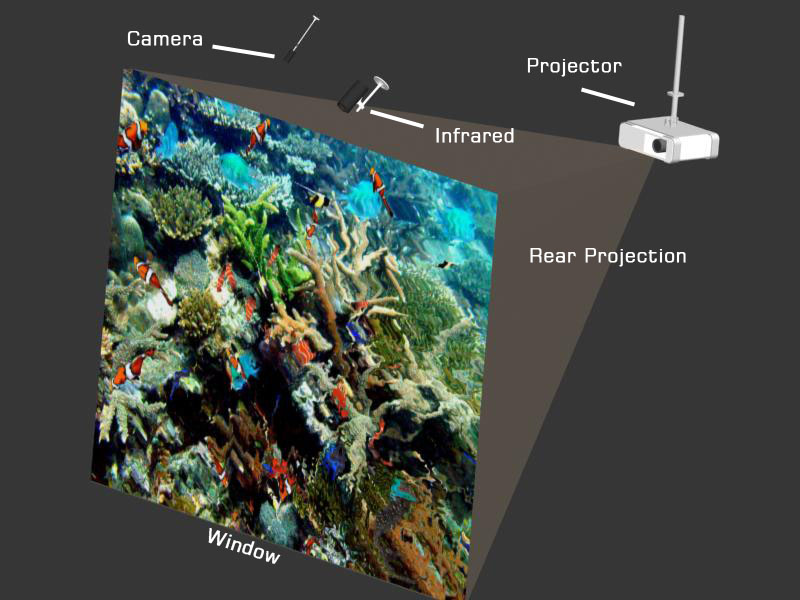
Interactive Window
For an interactive walk-by window installation, the tracking kit ideally needs to be placed above the projection screen and faced outside at an angle. Changing the angle will determine the area people can interact with the window. Some effects will not be suited to a window installation due to the way motion is detected. As an example, the 'Flip' effect will work fine if the tiles are laid out from left to right, however, because of the position of the tracking camera, Flip Tiles that are laid out from top to bottom would not work in the same way as they would on a floor. If you went to 'touch' a tile at the top, it would also set off a tile further down the screen. The exception to this is using the diffused projection screen installation method.
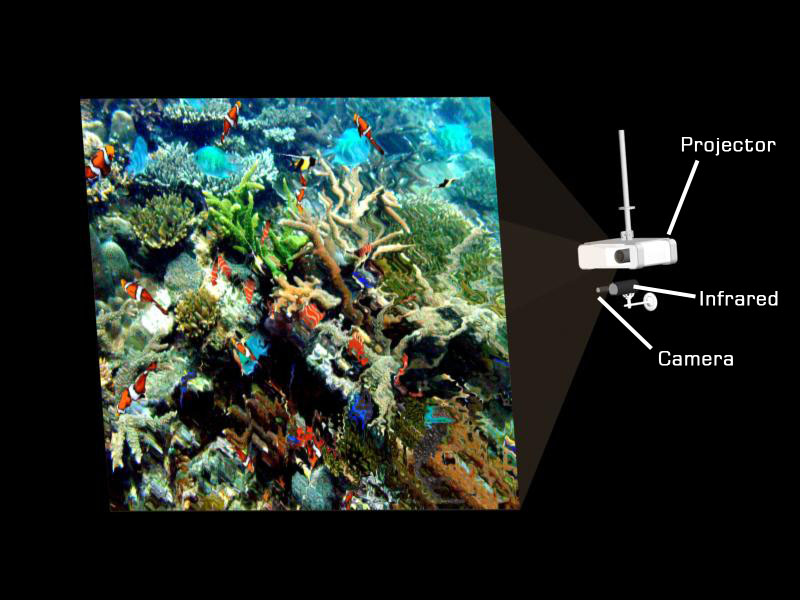
Interactive Window - Diffused Screen
Depending on the screen used for the window projection and the lighting environment, it may be possible to create a more accurate projection system which is more similar to a touch screen. In this installation, the tracking kit is placed directly behind the projection screen, the infrared beam needs to cover the entire screen evenly. If the screen diffuses light enough, you should only be able to see motion when someone's hand is very close to the screen. Anything further away is completely diffused and therefore not tracked. This would allow you to create an accurate touch screen effect such as the 'Flip' effect allowing only specific areas of the screen to be interacted with. If outside the window is bright, you can create the same effect by switching the effect off and detecting shadows when hands are close to the screen.
Once you have the projector and tracking kit installed and plugged into the PC, the rest of the configuration is done within our software. See 'Getting Started' for a quick-start guide or 'Configure AdVis' for more advanced help.